Are you planning to start a WordPress blog? One of the most important steps is choosing the right WordPress hosting — a decision that can make or break your website’s performance, speed, and growth.
With so many shared hosting and managed WordPress hosting providers on the market, it’s easy to feel overwhelmed as a beginner. That’s why we did the research for you and tested the top options to find out which one truly stands out.
After comparing performance, reliability, and value for money, Cloudways ranked as our #1 recommended WordPress hosting provider — and for good reason. We’ve personally hosted our own site on Cloudways for quite some time, and we can confidently say it was one of the best decisions we ever made for our online presence.
If you’re serious about building a fast, secure, and scalable WordPress blog, Cloudways should be at the top of your list.

Why Cloudways Stands Out as the Best WordPress Hosting for Bloggers
If you’re searching for an affordable, beginner-friendly, and secure web hosting platform, Cloudways is the perfect solution. Thousands of bloggers and website owners around the world rely on Cloudways to power their WordPress blogs, eCommerce stores, and even web applications with ease.
What makes Cloudways truly stand out is its balance between simplicity and powerful performance. Whether you’re launching your first blog or managing multiple sites, Cloudways provides all the tools you need to grow confidently — without dealing with complex server setups or hidden technical issues.
Here are some of the standout features that make Cloudways one of the best alternatives to WP Engine and other managed WordPress hosting services:
✅ 24/7 Live Support – Get instant help whenever you need it.
✅ On-Demand Backups – Restore your site in seconds with one click.
✅ Free CDN Integration – Boost your website speed for global visitors.
✅ One-Click Installs – Set up WordPress or apps within minutes.
✅ Easy Migrations – Move your site to Cloudways without downtime.
✅ Unlimited Applications – Host multiple sites under one account.
✅ Cron Job Management & WP-CLI – For developers who want full control.
✅ Add-Ons & Integrations – Extend your hosting capabilities with premium tools.
With all these features, Cloudways isn’t just another hosting company — it’s a complete WordPress hosting ecosystem designed for performance, flexibility, and growth.

How to Claim Cloudways Promo Code?
Next, let’s see how to claim the discount.
Total Time: 10 minutes
Open Cloudways

First of all, go to Cloudways.
Open Pricing Page

Now, move to the pricing page.
As I mentioned above, you could use your app on Cloud hostings like:
DigitalOcean
Linode
Vultr
Amazon AWS
Google Cloud
The cheapest configuration will be on DigitalOcean, and the expensive (from the list) configuration will be on Amazon AWS. When you handle a small personal blog, the DO Basic plan is good enough. As your business/ blog grows, you can easily upgrade to a higher package.
If you are currently on any other hosting and wish to switch, you could quickly contact the Cloudways support team. On the other hand, using a backup plugin like BackupBuddy, you could move your website entirely from one server to another.
Choose a Server

Anyway, we are about to get the DigitalOcean basic plan. Simply click on the start free button.
Open Sign Up Page
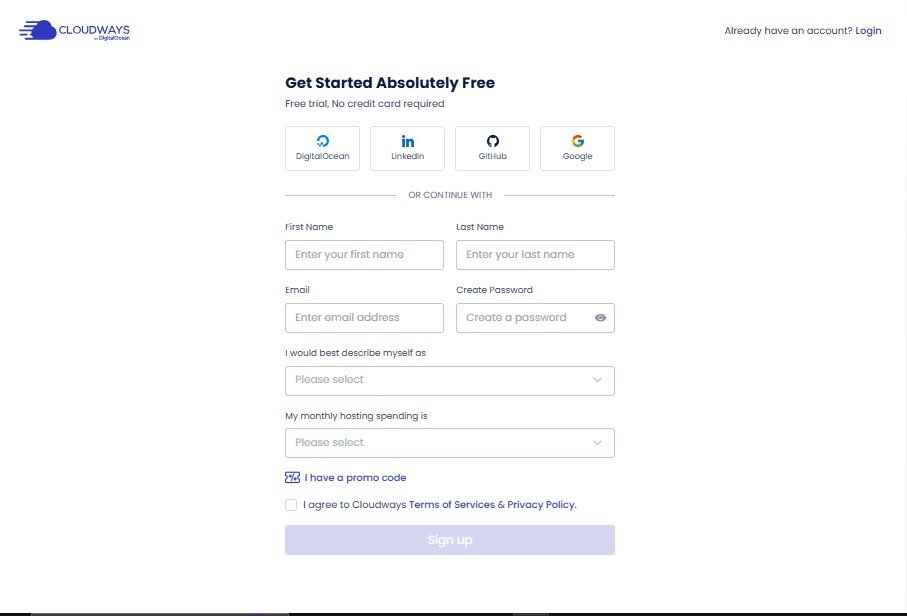
You will be redirected to the sign-up page then.
Simply enter your
First Name
Last Name
Email Address

Apply Coupon Code

Also, describe your business as a blogger or choose the role that suits you. Then move to the budget. Below that, you will see a submit box for entering a Cloudways promo code. Enter PAYUOC in the box and complete the registration.
No additional steps! You have successfully applied the promo code to your account!
Open the Dashboard

Wait a few seconds there, and the system will automatically redirect you to your account dashboard.
Move to Account Activation

Also, don’t forget to activate your account. They will instantly send you a confirmation email to your registered email address. Click on the verification link to see the following process – phone number verification.
Link Mobile Number

Enter your number and verify it by SMS or call.
Confirm the Number
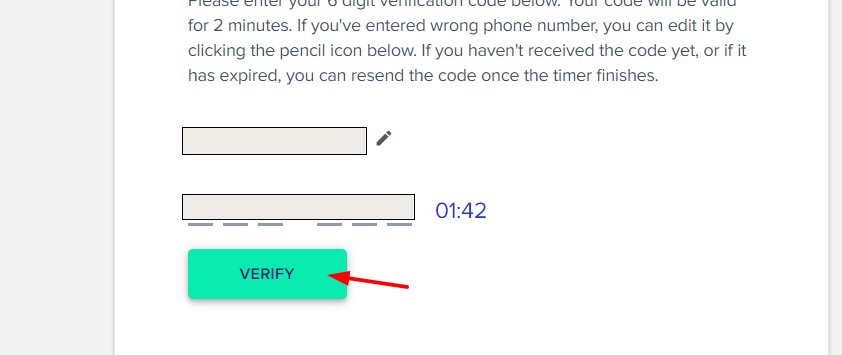
Enter the OTP that you received.
You now have a wholly verified/activated account!
Choose the CMS
From the application and server details, you can choose your CMS.

There are a few available apps:
WordPress
WooCommerce
PHP
Laravel
Magento
Drupal
Opencart
Prestashop
Joomla
Etc…
Name the Server

Also, don’t forget to name your app and server.
Select Resources

Then, choose the Cloud service, disk space you need, and server location. My previous configuration goes here. But, I would like to change the disk space to 20 GB. And possibly, this will be a bit more expensive than the previous configuration.
Launch the Server

Wait a Few Seconds
Click on the launch now button
Wait a Few Seconds

It will take a few minutes to complete the setup. You need to wait while they add a new server for you!
Server Added

And once they completed the server configuration, you will see something like this:
Check Applications

Shift to Applications from servers, and you will see your WordPress installation.
Open App Configuration

Click on the app to see the configuration wizard.
You can configure your application from there! It’s so simple!
As you know, you are on a free trial now. You might want to upgrade your plan within 3 days for seamless working. In these 3 days, you can test their environment for speed and security.
By entering your credit card details, you can upgrade your account. In addition, the 40% for 2 months discount will be added automatically!
Estimated Cost: 10 USD
Supply:
- A Computer
- Internet Connection
Tools:
- Credit Card